The current bike is a Honda CRF 1100 Africa Twin Adventure Sports (manual), purchased in November 2025 from Church Street Motorcycles on the Isle of Wight. I went for the manual rather than the DCT as im old school and like a clutch and also there was the price premium!
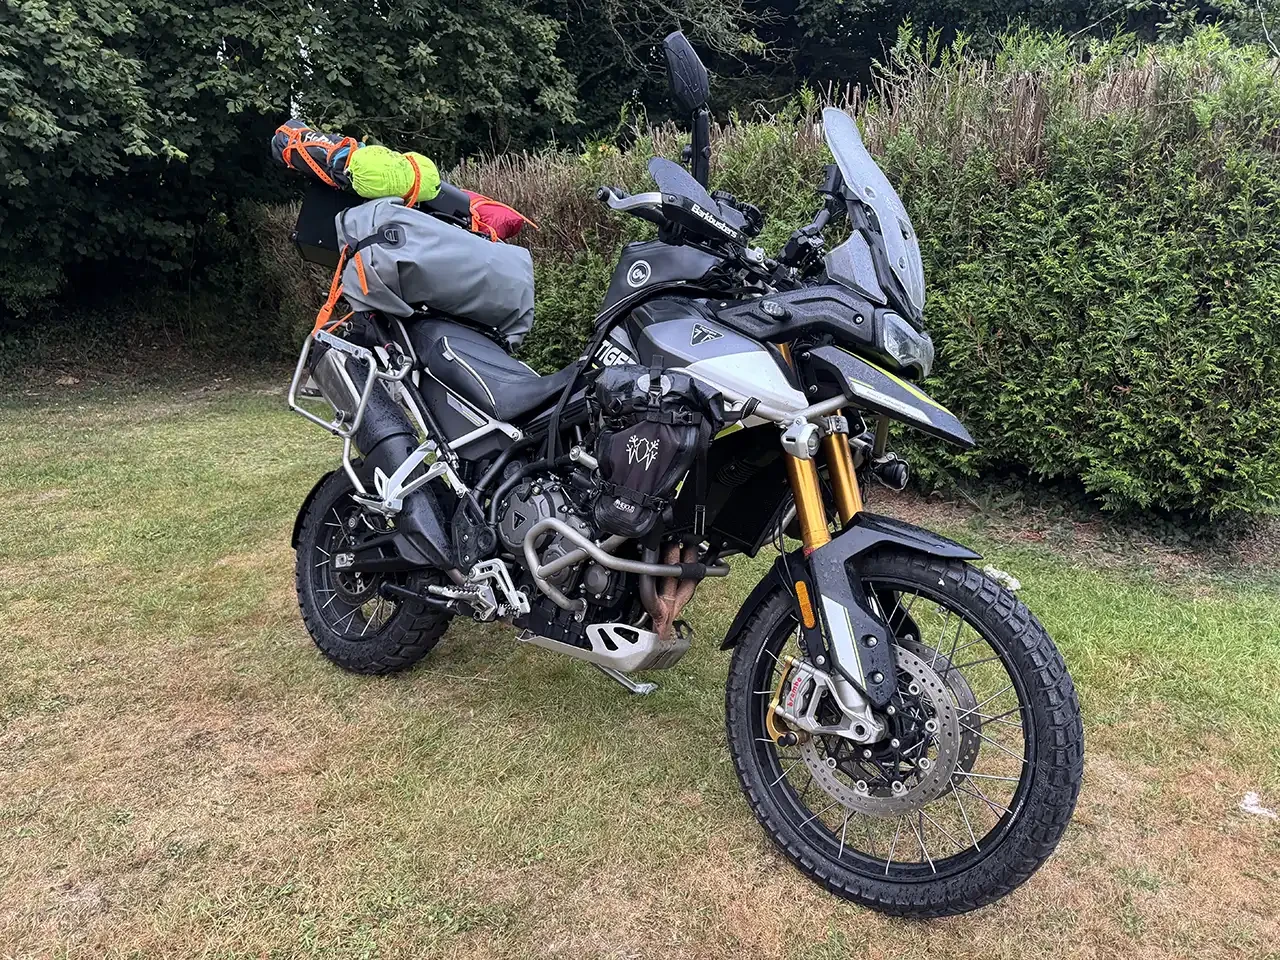
I wanted a change — the previous bike was a Triumph Tiger 900 Rally Aragon, and a lovely bike, but it was time to move on to something different.
To improve comfort for long days in the saddle, a rider and pillion Sargent seat was ordered from Sargent Cycle Products in the USA.
Rear End Setup and Protection
The first job was sorting the rear of the bike properly.
A tail tidy was fitted, and rather than just bolting it straight on, a custom 3mm aluminium plate was fabricated to mount everything properly.
The Aluminium plate was drilled to take:
(i) Denali T3 modular switchback signal pods (left and right)
(ii) Denali B6 auxiliary brake light (mounted underneath)
(iii)Number plate mounting points
Once drilled, the plate was treated with acid etch primer and finished in matt black before final assembly.
A rubber backing sheet was also cut to size and fitted between the tail tidy and the underside of the bike. The Africa Twin has two large openings in this area which allow road dirt and water straight through. Sealing this off made a noticeable difference in reducing the amount of filth thrown up into the rear section.
To help further with road spray and filth:
(i) R&G shock cover fitted to protect the rear shock
(ii) Rear spray guard added
CRF1100 Wiring and Electrical Setup
The electrical side of the build was done properly from the start.
A Hex ezCAN Sahara unit was installed under the pillion seat to manage the rear electronics. A second ezCAN unit was added under the main rider’s seat to handle the front lighting and forward accessories separately.
The Ride Vision module is also mounted under the main seat.
All wiring was done as it should be:
(i) Denali looms used where appropriate
(ii) one loom modified where required
(iii) all joints soldered
(iv) Raychem adhesive-lined thin-wall heat shrink used throughout
Denali three-pin waterproof connectors were used for all Denali components. For other connections, Superseal 1.5 series waterproof connectors were used throughout.
All wiring was wrapped in automotive cloth tape to match OEM Honda looms, and any wiring under the tank was protected inside 12mm black flexi conduit.
Large 6mm red tri-rated wires were run direct from the battery to 5 way wago blockes under the seat to act as a distribution center for the excans, the warm and safe heated gear output and the garage trickle charger which was wired via a 2-pin Superseal 1.5 (female) connector.
CRF1100 Rear Protection and Luggage Setup
A black rear tail rack was installed, this was pre-drilled and fitted to this was the Ride Vision rear facing camera
Pannier racks were fitted and modified to suit the Mosko Moto Backcountry pannier system using the offset 35L / 25L setup. Having used various luggage systems over the years, including different soft bag setups and hard panniers, the Mosko Moto kit is by far the best I have used.
The 35L / 25L arrangement works particularly well because it keeps the bike no wider than the handlebars, which makes a real difference when filtering or when trying to squeeze through tighter gaps where large hard panniers would just become a nuisance. For the rear rack, luggage is handled with either the Mosko Moto Backcountry 40L duffle or the Alpine 50L bag depending on how long the trip is likely to be.
On the tank, an SW-Motech PRO Micro WP waterproof 4-litre tank bag was fitted using the SW-Motech PRO tank ring system, as over the years I have found that strapped tank bags tend to mark the paint if left in place long enough.
All supplied fixings for the rear rack were replaced with black marine-grade A4 stainless hardware from Accu.
Front End Build
Once the rear was sorted, attention turned to the front.
The fairing was removed to gain proper access to wiring and mounting points.
The following were installed:
(i) Lone Rider Moto Lights mounted on the Heed crash bars
(ii) Denali D3 driving lights with amber lenses for Daytime Running Lights and indicator use
(iii) Honda emblem side indicators
(iv) Denali SoundBomb horn
(v) R&G stainless radiator guards
(vi) Heed crash bars, upper and lower
(vii) A CarLinKit 5 unit was also wired in and mounted in a dry area under the fairing to provide wireless Apple CarPlay via a USB cable connected to the Hondas waterproof car play USB port
(viii) Set of white Bark Busters
The lights were all wired back to the second ezcan under the riders seat.
Navigation and Charging Setup
A Givi bar mount was added above the Africa Twin dash, allowing a standard bar clamp to be used for navigation.
This setup allows use of:
(i) Garmin Zumo XT2
(ii) Garmin Monterra
A Peak Design magnetic phone charger was also fitted to the handlebars.
Both the phone charger and Garmin supply were wired into the bike’s switched cigarette lighter circuit. The wiring was properly spliced, soldered and sealed with Raychem adhesive-lined heat shrink so everything is ignition-controlled, waterproof and reliable.
Ride Vision System
A Ride Vision camera and safety system was installed.
This is a front and rear camera system that provides:
(i) blind spot detection
(ii) collision warnings
(iii) real-time visual alerts
The main unit is mounted under the rider’s seat, keeping it protected and out of the way. The cameras are mounted discreetly and integrate cleanly with the bike.
Take the long road home — miles today, stories tomorrow.